Setting Up Your eSIMiOS (QR code)

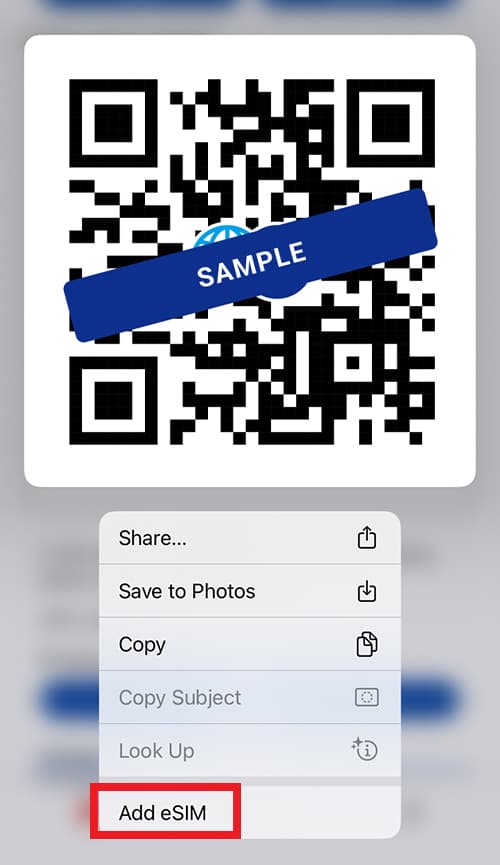
Click here to set up with the application.

Attention
  • Make sure you have a stable internet connection to install and activate the app and eSIM.
  • Your eSIM has an expiration date. Make sure the date hasn't passed before you install and activate the app and eSIM.

What you'll need to install the app

  • Your personal electronic
    (phone, tablet, etc)

    Make sure your electronic is SIM-free or unlcoked to be compatible with eSIMs

  • Internet connection(Wi-Fi,etc.)

    Device must be connected to the Internet.

  • QR Code

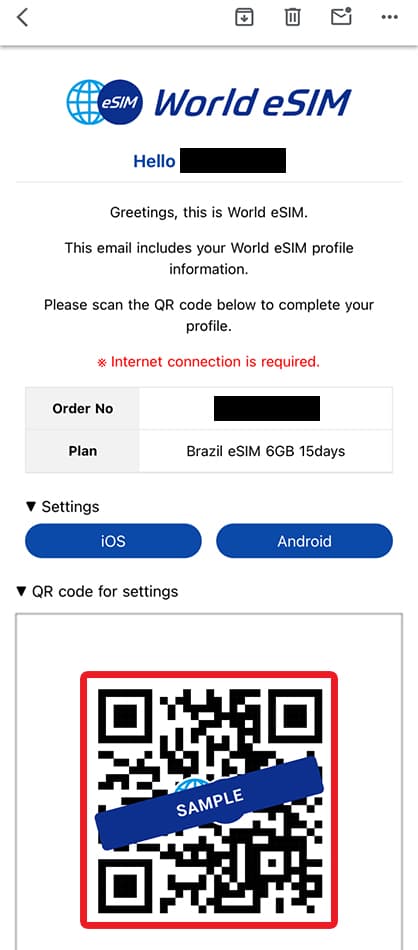
    You can find your QR coe in your confirmation email, our app, or your account (My Page)

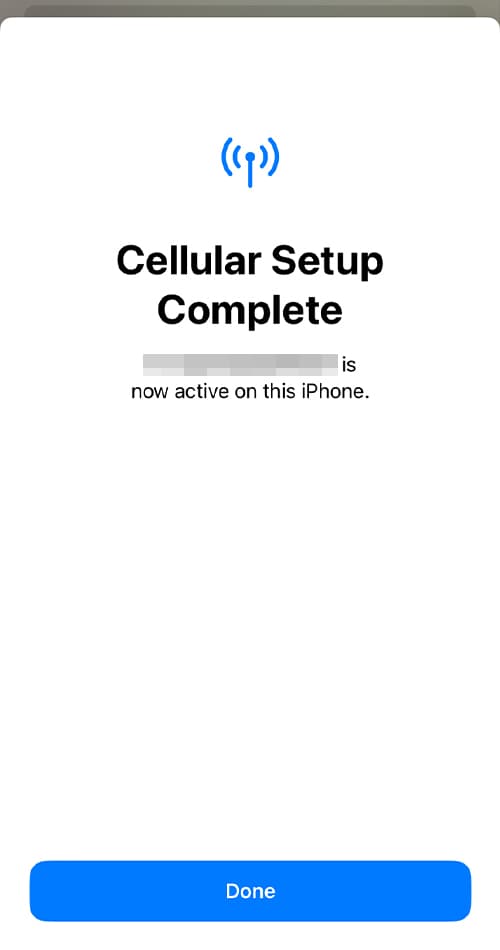
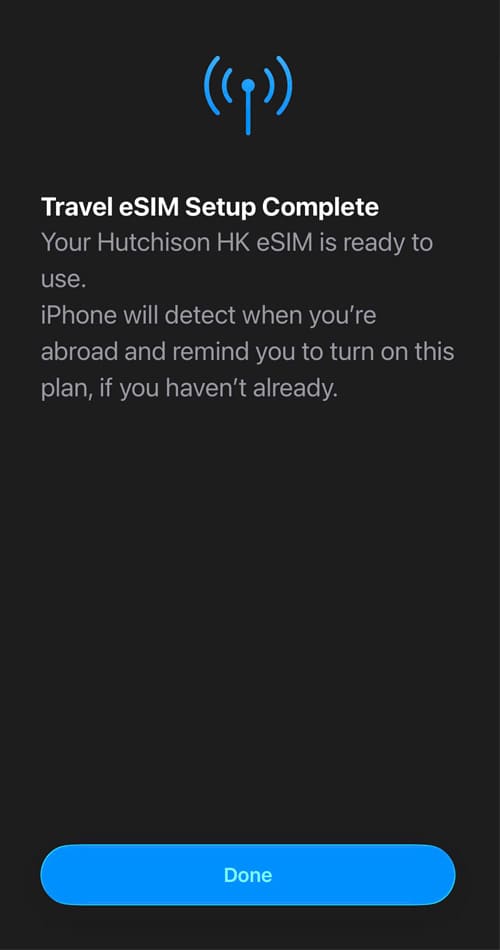
How to set up your eSIM

There are two steps to set up your eSIM

STEP 1Installing Your eSIM

  1. 01After ordering your eSIM, you will receive an email with a QR code.

    *This guide is for iOS 17.4 or later. Steps differ for iOS earlier than 17.4.

    • This QR code cannot be read on standard QR code reading apps.
    • Screenshots of the QR code sent by email will not read correctly.
    • Press and hold the QR code to proceed with installation.
  2. 02Installing your eSIM

    1. Tap and hold the QR code in your confirmation email
    2. Tap "Add eSIM" in the menu that appears
    3. A popup to "Activate New eSIM" will appear, tap "Allow"
    4. Tap "Continue" to begin installation
    5. Tap "Done" to finish installation
  3. 03Select "Personal" as the default line and tap "Continue".

    ※Depending on the type of eSIM, options other than "Personal" may be displayed. In such cases, please select an option of your choice other than "Primary Line".

  4. 04You don't need to choose Personal or Primary default lines for iMessage or FaceTime. Tap "Continue".

    ※To continue sending and receiving messages through iMessage or FaceTime with your current phone number, please select "Primary Line." You can change this setting later if needed.

  5. 05Select "Personal" for mobile data communication and tap "Continue".

    ※If there is "Allow Cellular Data Switching" displayed, do not turn on.

  6. 06Your eSIM is now installed and activated!

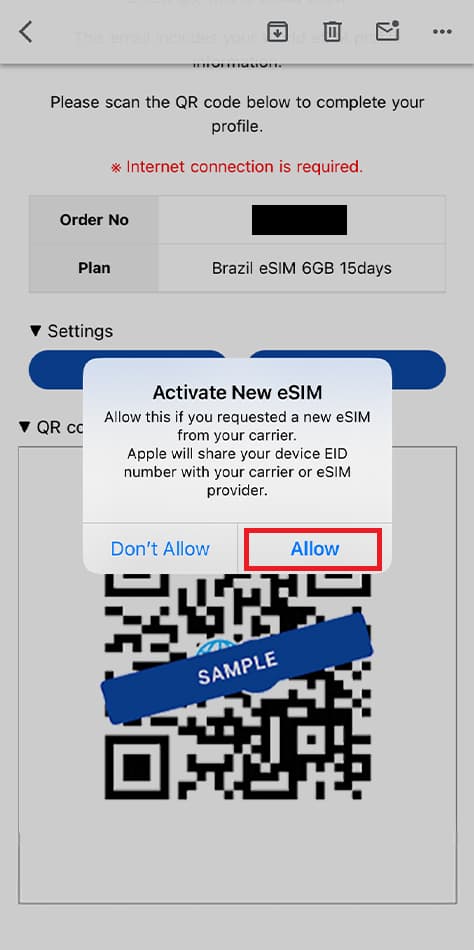
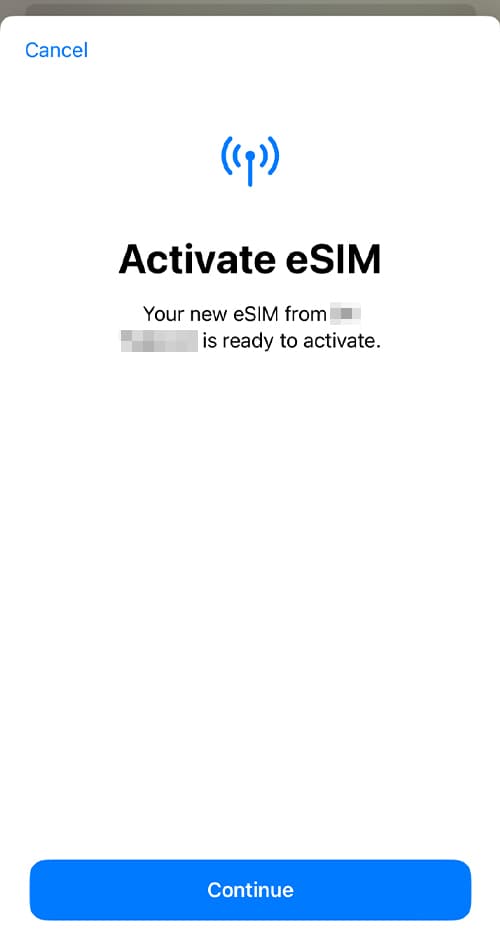
    Next, proceed with the eSIM connection settings on the device management screen.

STEP 2Device Settings

  1. 01Go to Settings and tap "Cellular".

  2. 02Tap the newly added eSIM.

  3. 03Enable "Turn On This Line" and "Data Roaming".

  4. 04You've finished setting up your eSIM!

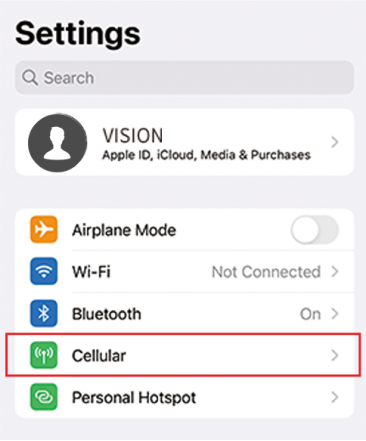
    Operational procedures may vary depending on your device settings, operating system, update version, and other factors.

Reverting settings after your return
  • Revert the settings you changed in step 02 and 03.