Setting Up Your eSIMWorld eSIM App(Google Play Store)

Downlad the World eSIM App Here ▶

Click here to set up via QR code instead of app

Attention
  • Make sure you have a stable internet connection to install and activate the app and eSIM.
  • Your eSIM has an expiration date. Make sure the date hasn't passed before you install and activate the app and eSIM.
  • The display and language may differ depending on your model and OS version.

What you'll need to install the app

  • Your personal electronic
    (phone, tablet, etc)

    Make sure your electronic is SIM-free or unlcoked to be compatible with eSIMs

  • Internet connection(Wi-Fi,etc.)

    You must be connected to the internet to install and activate the app and eSIM

  • World eSIM App

    We recommend you download the app before you travel

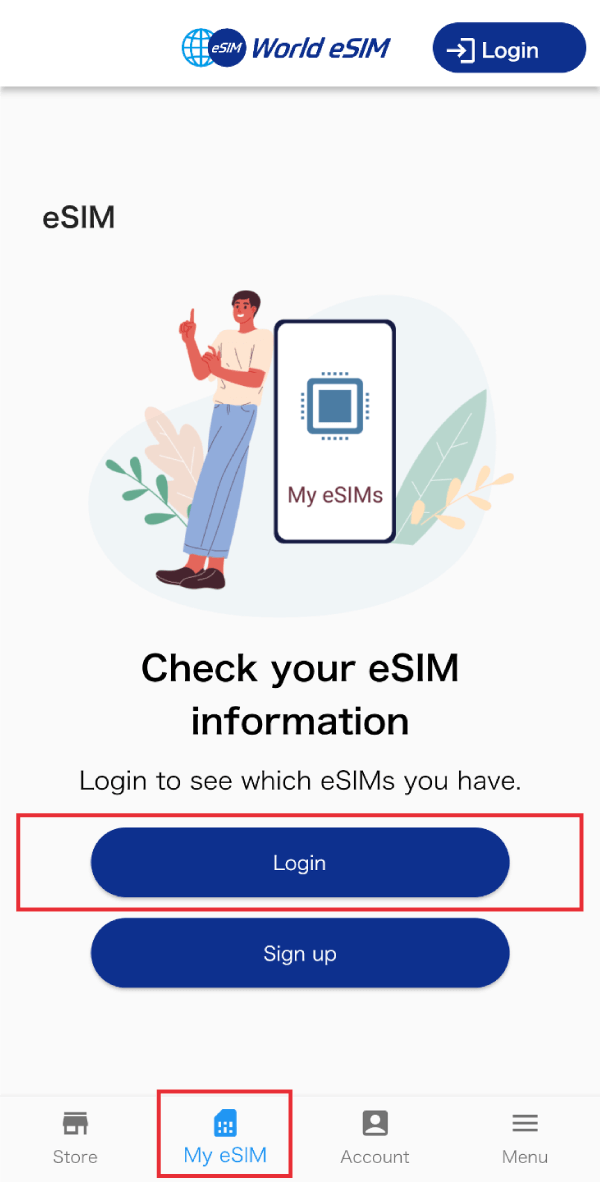
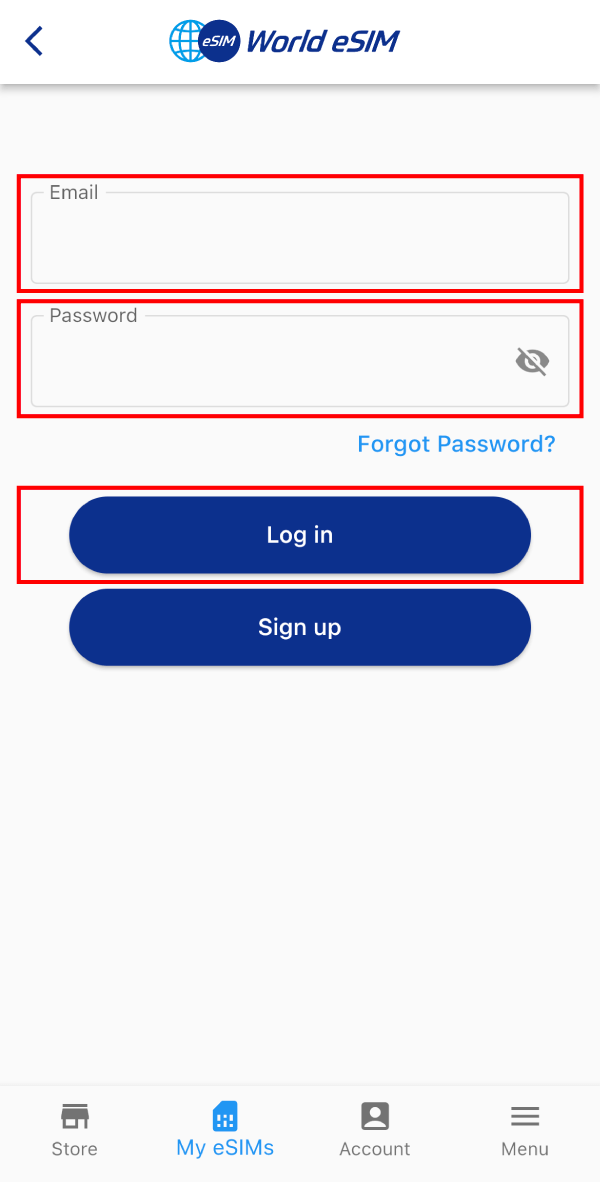
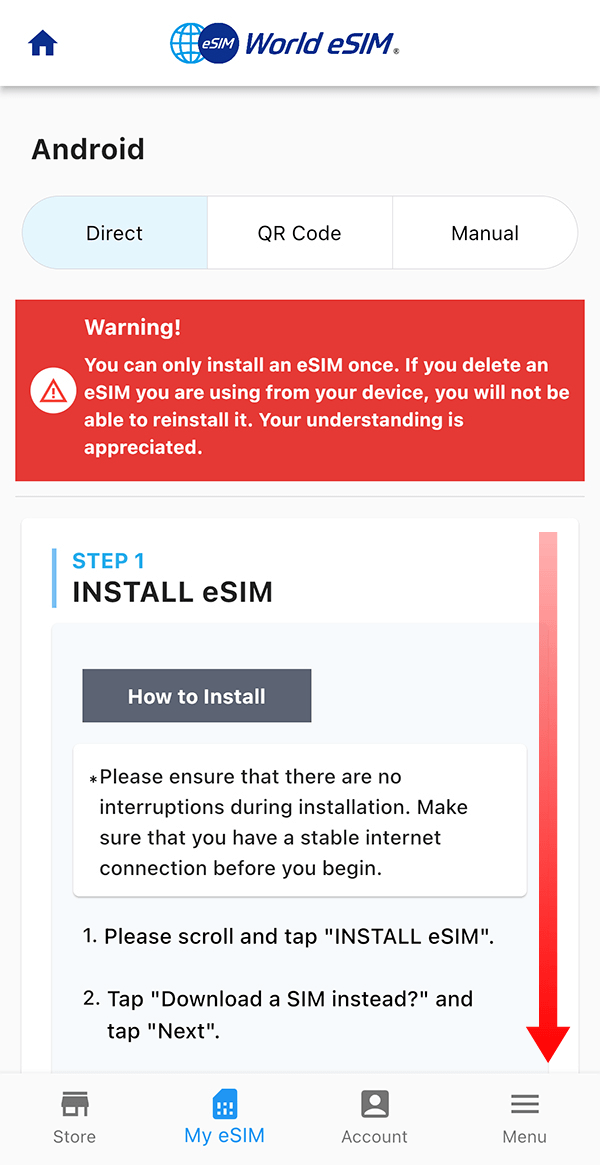
How to set up your eSIM

There are two steps to set up your eSIM

STEP 1Installing Your eSIM

  1. 01Open the World eSIM app, tap on "My eSIM" in the bottom nav, and login. Tap on the "Details" button on the plan you want to activate.

  2. 02Tap "Android Device" and scroll down to the bottom to tap on the "Install eSIM" button.

  3. 03Download the SIM.

    1. Tap "Download a SIM instead?" and tap "Next".
    2. After the download is complete, tap "Settings" in the lower right corner of the screen.
  4. 04Your eSIM is now installed and activated!

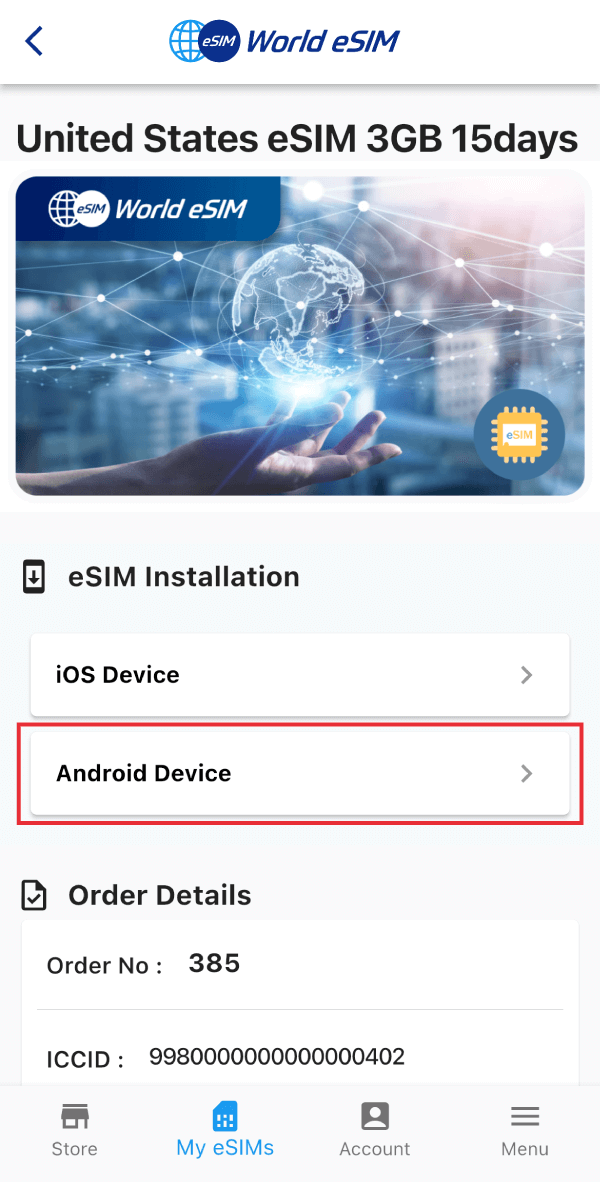
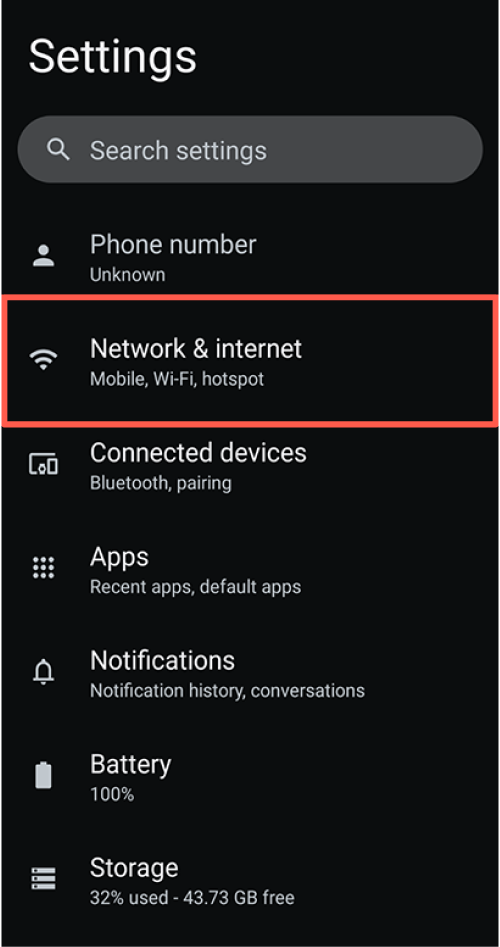
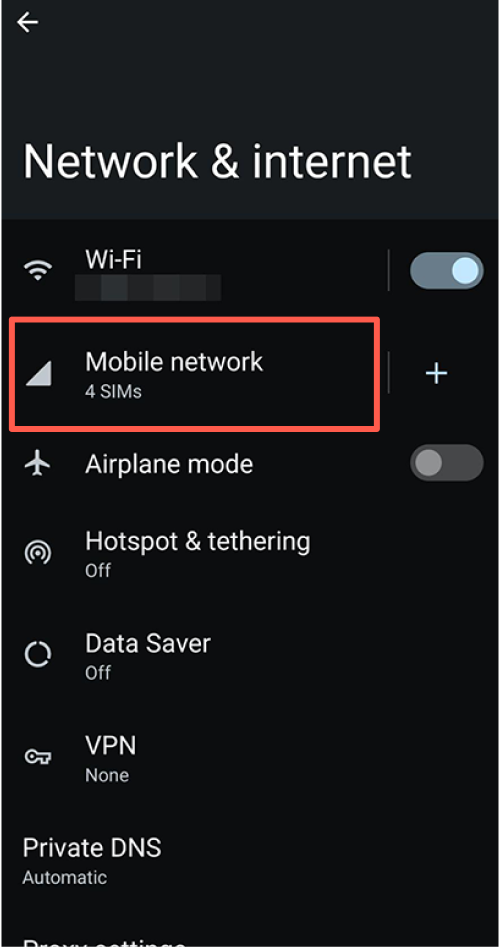
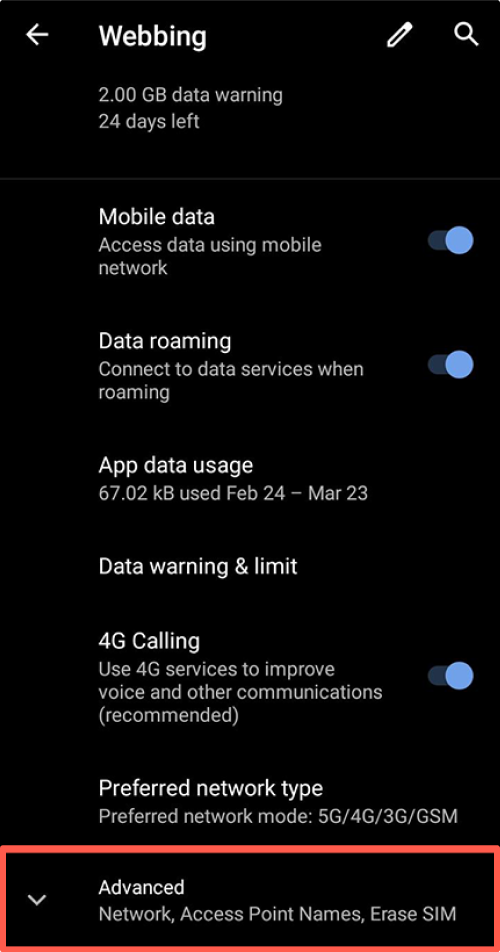
    Next, proceed with the eSIM connection settings on the device management screen.

STEP 2Device Settings

  1. 01Go to your phone settings, tap on "Network & internet", "Mobile network", then the eSIM you installed in the previous step.

    ※The name of the mobile network might differ depending on the specific eSIM plan you purchased.

  2. 02Enable the recently installed eSIM and select "Yes".

  3. 03Enable "Mobile data" and "Roaming".

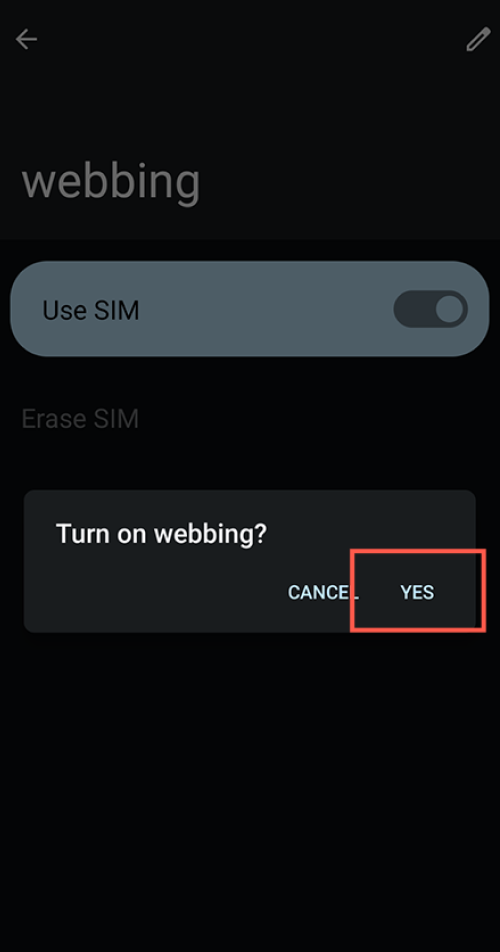
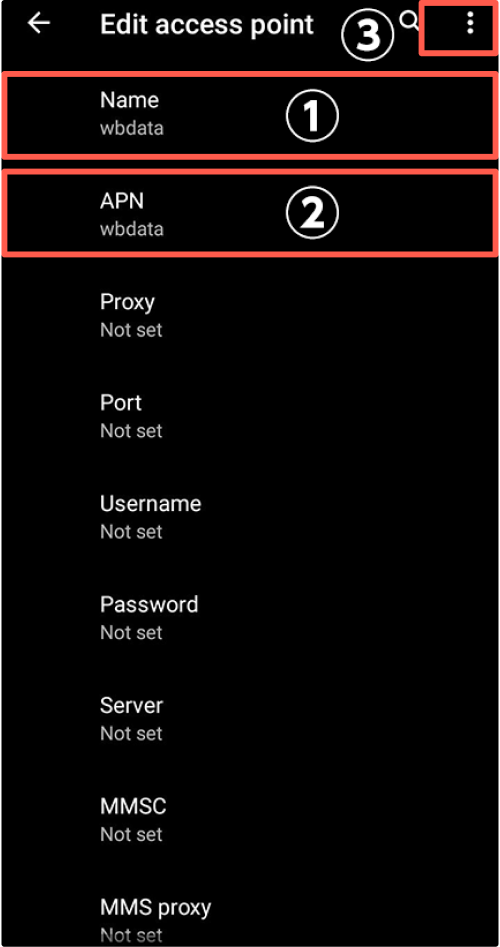
    Depending on the phone and eSIM plan you are using, set up may be completed at this point. Check to see if you can connect to the internet.

    If you cannot connect to the internet, proceed to the next step.

  4. 04Scroll down and tap "Advanced", then "Access Point Names"

  5. 05Edit the access point.

    1. Tap "+."
    2. Enter any name into "Name" (1), and the APN sent to your email into "APN" (2).
      [Name: Any name can be used. APN: Enter the APN sent to you by e-mail.]
    3. Tap the 3 dots on the top right and "Save" (3).
  6. 06You've finished setting up your eSIM!

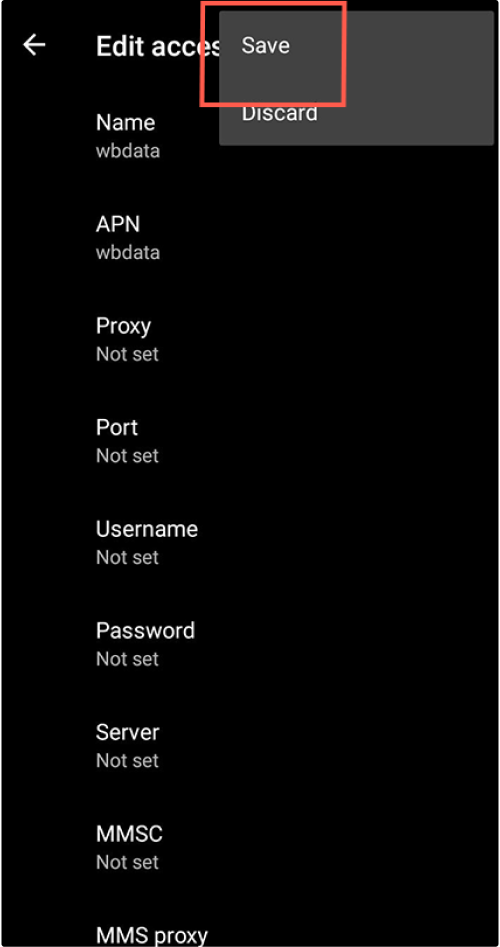
    Operational procedures may vary depending on your device settings, operating system, update version, and other factors.

Reverting settings after your return
  • Revert the settings you changed in step 01 and 03.