How to Set up your eSIMAndroid(Using a QR code)

Click here to set up with the application.

Please be sure to check below
  • A stable internet connection is required for installation and activation.
  • Expiration date varies on a plan. Please confirm the plan at the time of purchase.
  • The display and language may differ depending on your model and OS version.

Please be sure to have the following items ready

  • Devices that use World eSIM

    Please prepare a SIM-free device or an unlocked device that is compatible with SIM.

  • Internet environment(Wi-Fi,etc.)

    Device must be connected to the Internet.

  • QR Code

    You can check it on the app and on My Page. *It will also be sent to you by e-mail.

  • Smartphone, PC or Tablet

    Required to view the QR Code. OR Print QR Code on paper.

How to set up your eSIM

The eSIM setup is completed in the following two steps.

STEP 1Installing eSIM

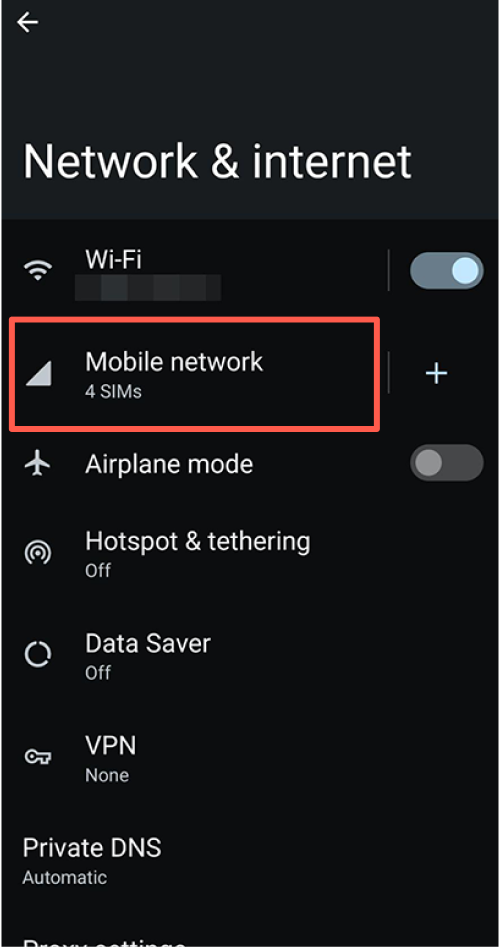
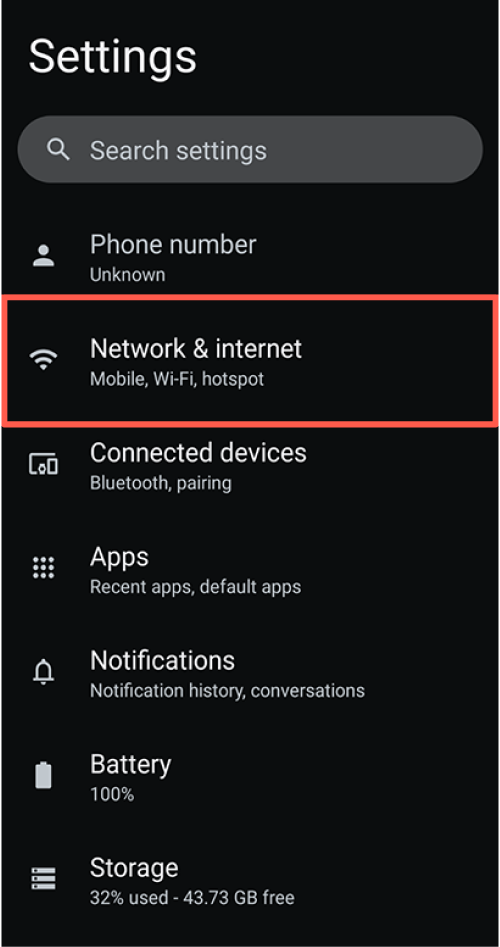
  1. 01Navigate to "Settings", tap on "Network and Internet", and tap "+" next to "Mobile network."

  2. 02Download the SIM.

    1. Tap "Download a SIM instead?" and tap "Next".
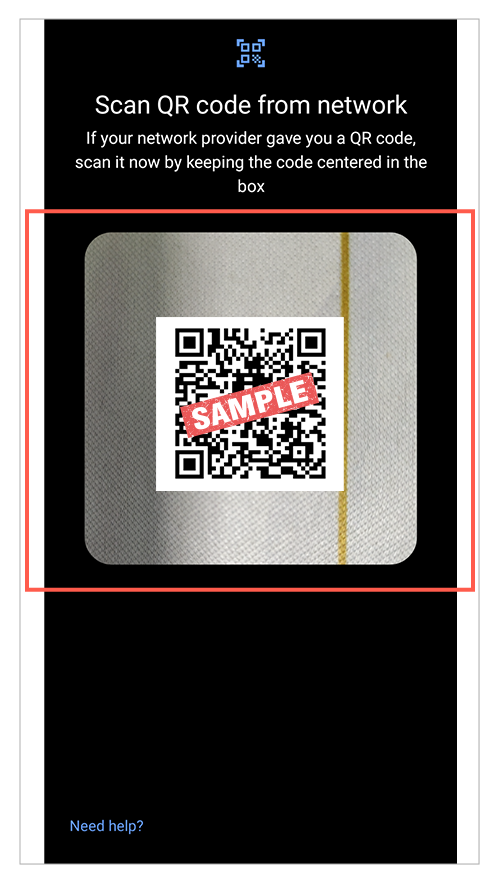
    2. Scan a QR Code.
      ※The QR code for loading the eSIM can be located within the application, on the "My Page" section, or in your email. You can either display it on a separate device, print it in advance, or have your companion show the QR code.
  3. 03Installation of World eSIM is now complete.

    The loading (profile installation) to your World eSIM device is now complete. Next, proceed with the eSIM connection settings on the device management screen.

STEP 2Device settings

  1. 01Navigate to "Settings", tap on "Network and Internet," followed by "Mobile Network," and choose the recently installed eSIM.

    ※The name of the mobile network might differ depending on the specific eSIM plan you purchased.
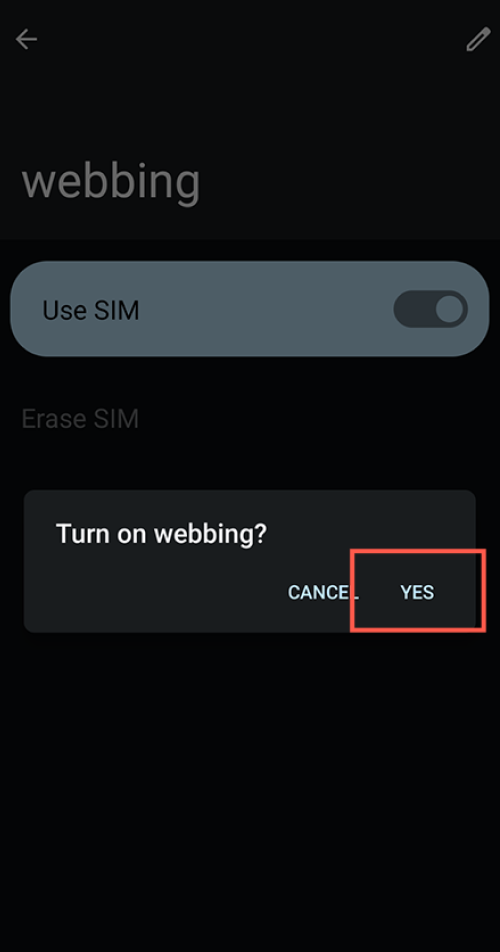
  2. 02Enable the recently installed eSIM and select "Yes".

  3. 03Mobile Data and "Roaming" must be enabled.

    Depending on the device and eSIM plan you are using, the setup may be complete up to this point.Please check to see if you can connect to the Internet.

    If not, please proceed to the next step.

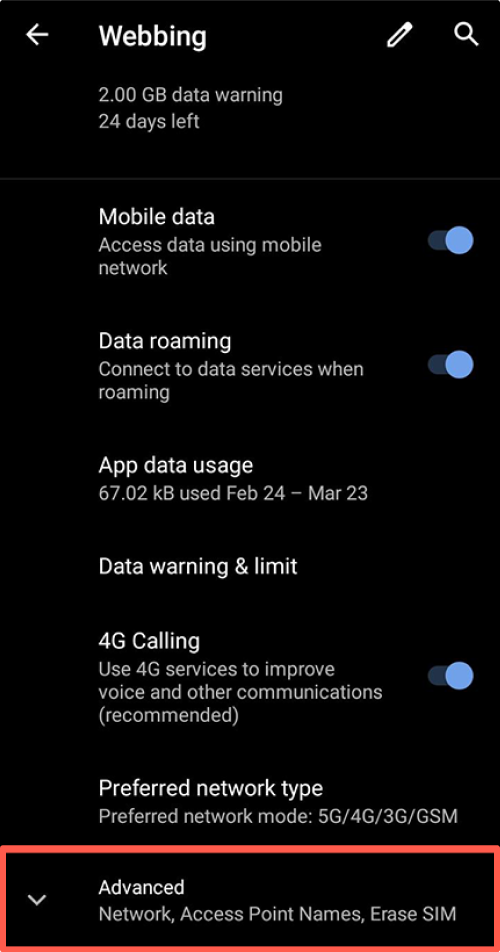
  4. 04Scroll down and tap "Advanced Settings" and then tap the "Access Point Name" button.

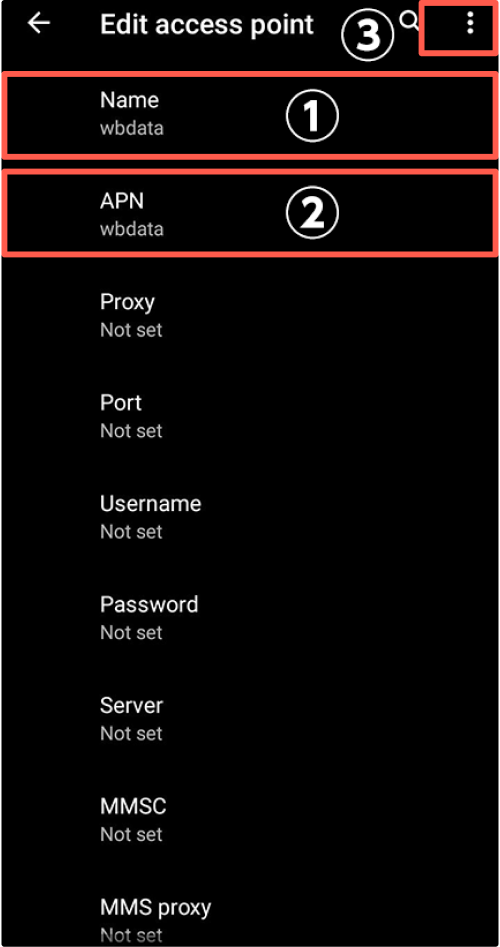
  5. 05Edit the access point.

    1. Tap "+."
    2. Enter name and APN in the "① Name" and "② APN" fields.
      [Name: Any name can be used. APN: Enter the APN sent to you by e-mail.]
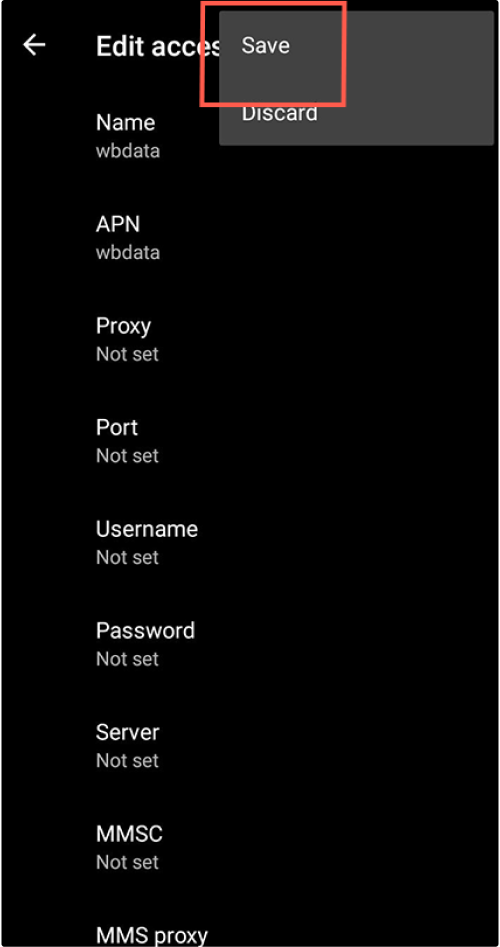
    3. After entering the information, tap ③ to "Save".
  6. 06Setup complete!

    This eSIM setup is now complete. Operational procedures may vary depending on your device settings, operating system, update version, and other factors.

Change of settings after return
  • To modify the settings upon return, select the carrier service at "01" and restore the settings at "03".